Group-Based Recording Access
Updated January 8, 2026
On this page
By default, everyone at Demodesk has access to view all meetings and recordings. However, if you want to restrict access to specific recordings or ensure that only relevant team members can view their own group's recordings, you can enable group-based permissions. This provides more granular control over visibility and access within teams.
What Are Groups?
Groups in Demodesk help you organize users (e.g., Sales Teams, Managers) and control who can see which meeting recordings.
Basic Group Setup
- Each team or department (e.g., Sales Team A, Sales Team B) should have its own group.
- Team members are added to their respective group.
- By default, group members can see the recordings of their own group.
1. How to Turn On Group Restrictions
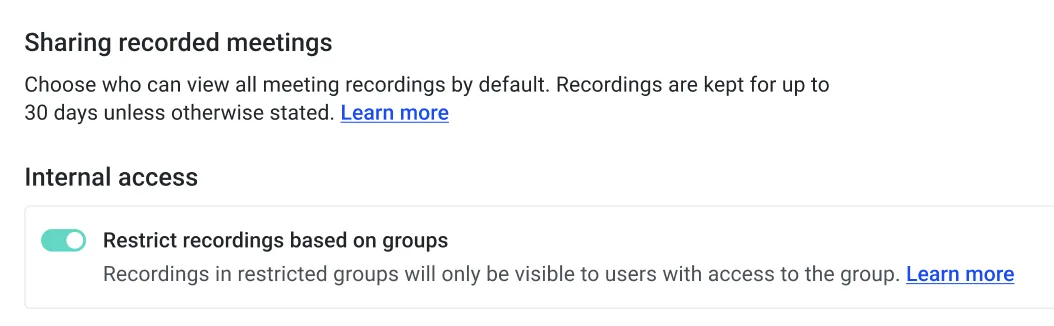
What this does: After toggling this on, recordings are visible only to members of the same group by default. To customize visibility settings further, navigate to the Groups tab, where you can manage access permissions for different teams.
Steps to enable:
- Go to the Recordings and AI section in your Demodesk Admin settings.
- Turn on Restrict access based on groups.
Updating Past Recordings: After you enable this feature, you’ll see a message asking if you want to apply the restrictions to old recordings.
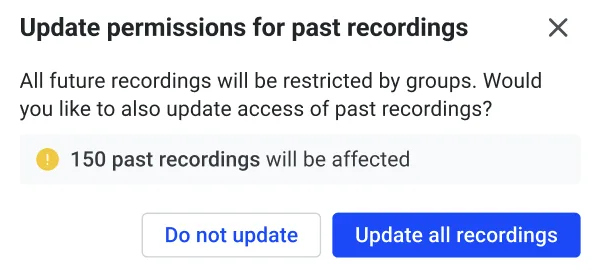
You have two options:
- Update all recordings: Past recordings will follow the new group rules. If a recording’s host is part of a group, that group gets access. If not, the recording will stay in the General group.
- Do not update: Old recordings stay the same. Everyone in the General group can still see them.
2. How to Set Up Group Access Rules
After you turn on restrictions, you can control who can see which recordings by creating groups and choosing access levels.
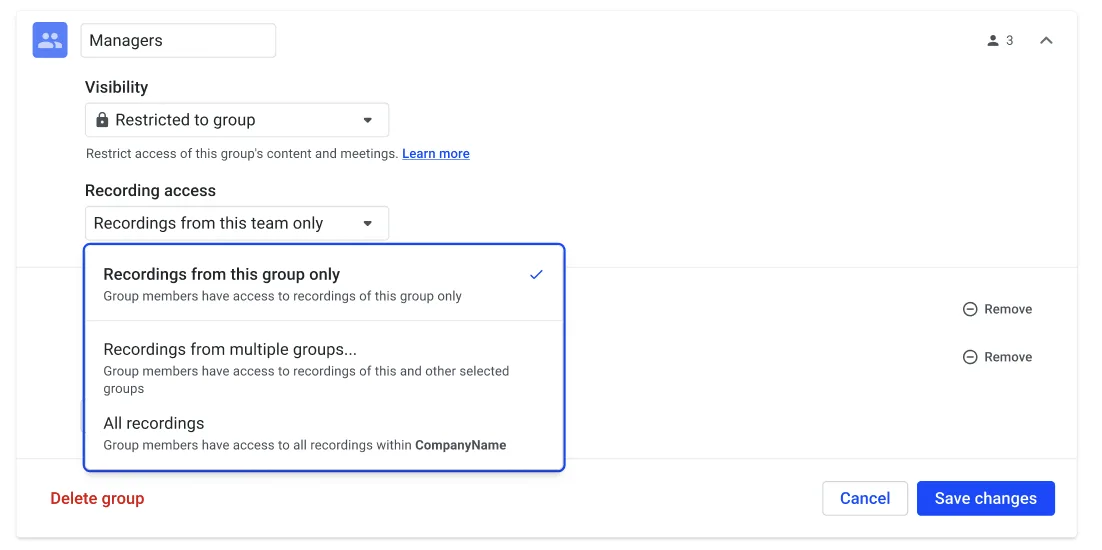
Create Groups:
- Go to the Groups tab in the Admin settings.
- Click Create Group.
- Give the group a name and add members.
Choose Access Levels:
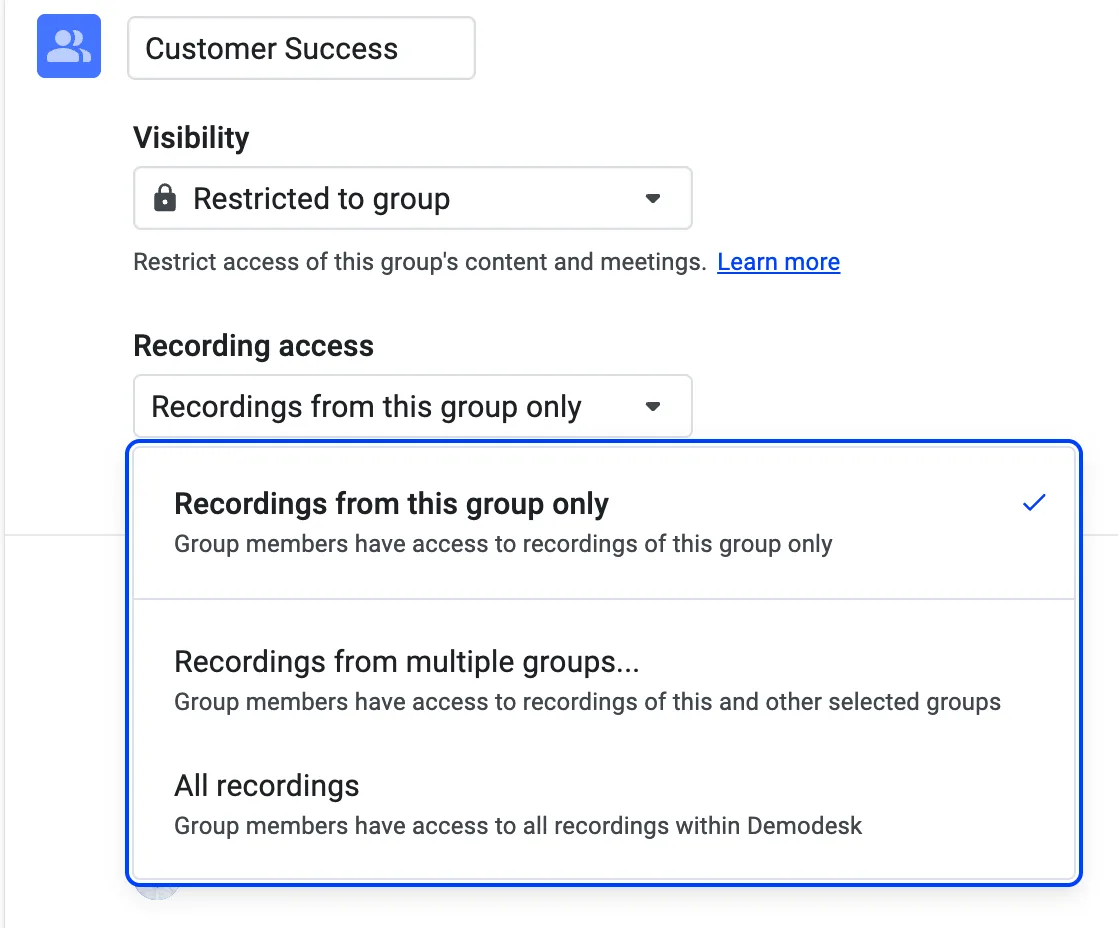
For each group, pick one of these options:
- Recordings from this group only: Members can only see recordings assigned to their group.
- Recordings from multiple groups: Members can see recordings from their group, plus any other groups you pick.
- All recordings: Members can see all recordings in the company (unless a recording has been restricted further, see here).
Example: If you want some people (for example, managers or admins) to see recordings from several teams, you can set up management groups.
How this works:
- You create a new group, e.g., a group for the management team.
- You then set this group to access other groups, e.g., the Sales Team group.
- Members of the management group can see all recordings from the Sales Team group.
- Members of the Sales Team group can only see their own group member's recordings.
Tip: This setup is useful when you want team leads to have broader visibility but keep recordings private between teams.
3. Manage Access For a Specific Recording
Admins, managers, and the meeting host can always update access for a specific recording.
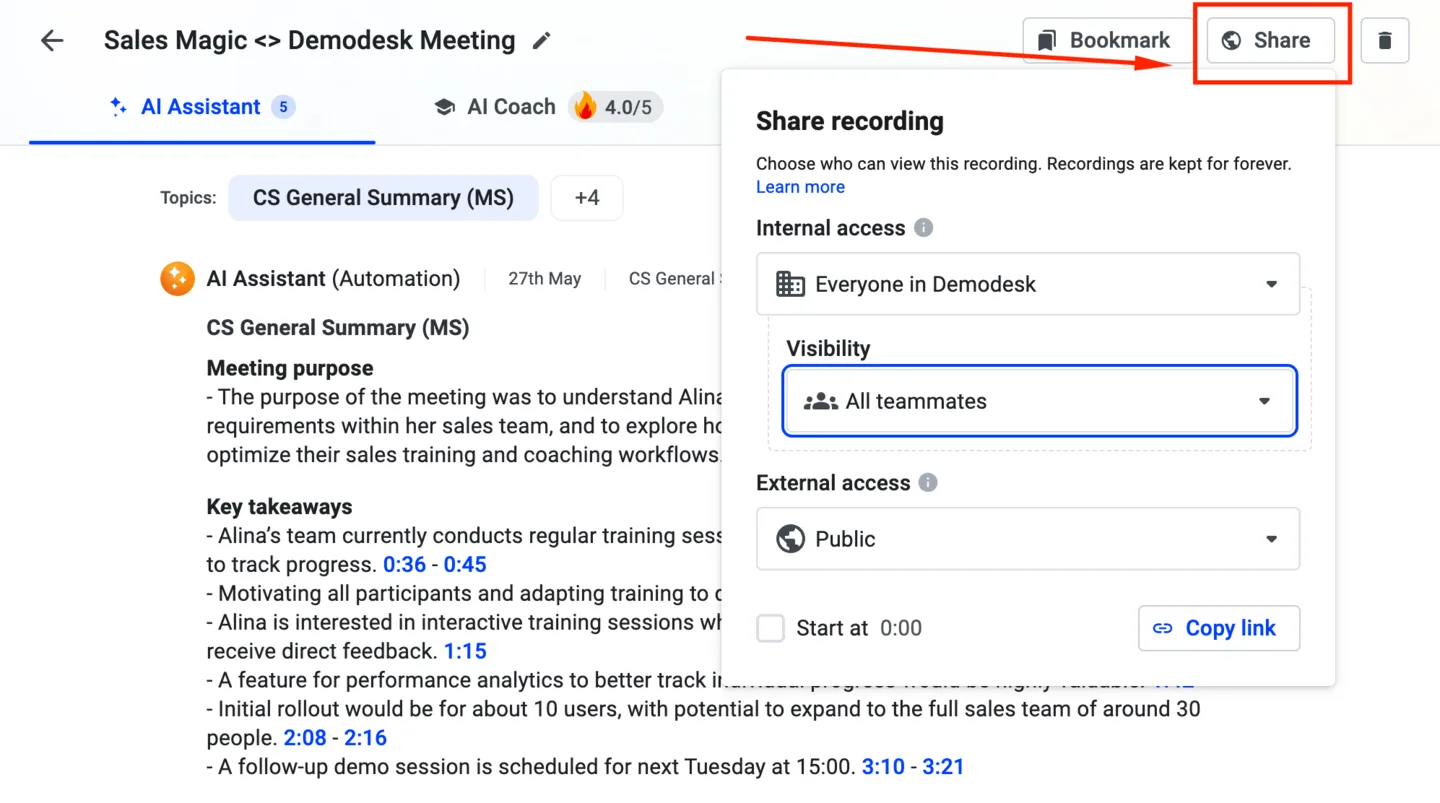
To do this:
-
Open the recording in Demodesk.
-
Click Share.
-
Choose who should have access: You can grant visibility to everyone in the company, limit it to specific groups, or restrict it to yourself only.
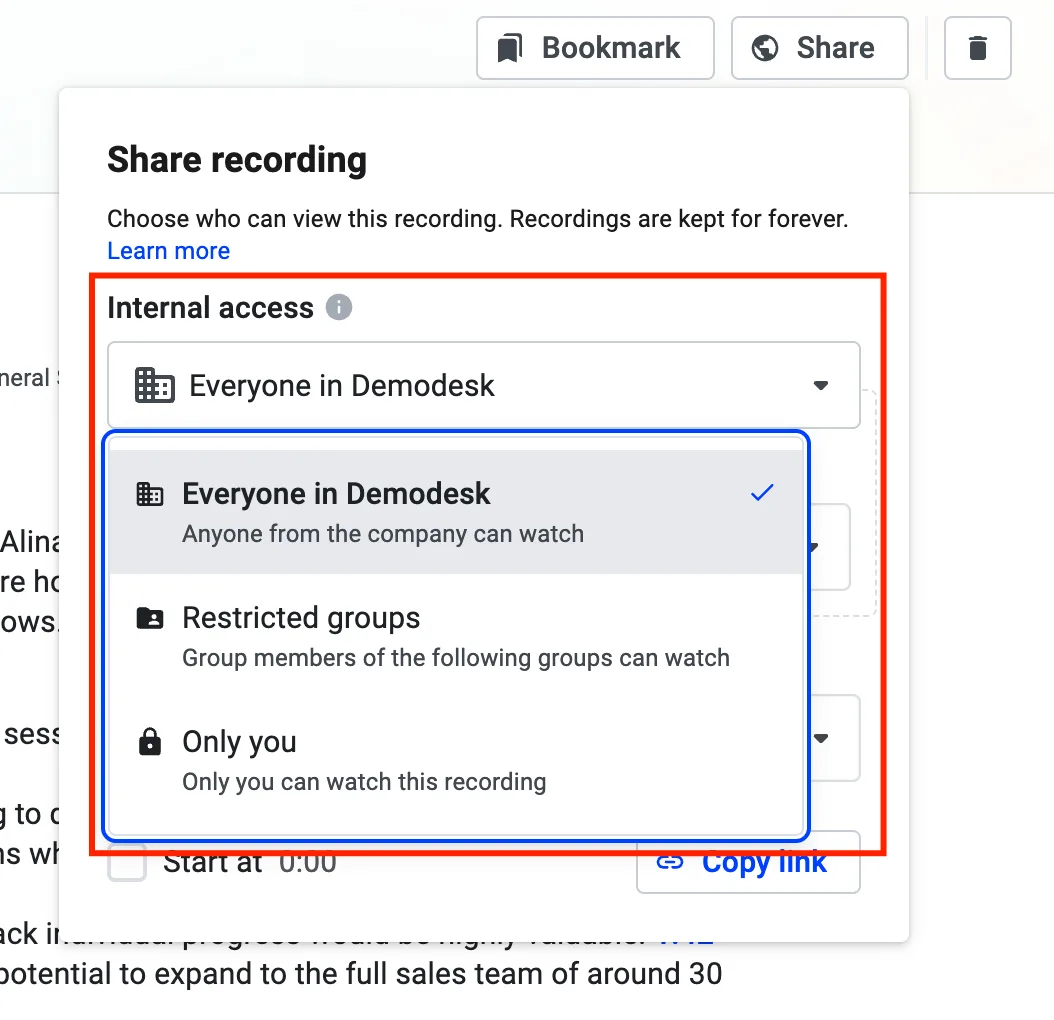
Use this when you need to share a sensitive recording with just a few people or need more control over specific recordings only.
Tip: You can restrict access for individual recordings even if the Groups feature is not enabled.
4. How Permissions Work
Demodesk checks permissions in this order:
- Group Settings (First):
- Decide which groups can see the recording.
- Example: If it belongs to the Sales group, only Sales members could have access.
- Recording Access Settings (Second):
- The host can make access stricter.
- Example:
- Admins Only: Only admins in the Sales group can see it.
- Only Me: No one else can see it at all.
Remember:
✅ Group decides who could see it.
✅ Personal Recording Preferences settings decide who actually does.
Best Practices
Manager Access
If a manager needs to see all recordings from their team but doesn’t want their own recordings visible to the team, you can do the following:
- Create a separate “Manager” group (e.g., “Sales Team A Management”).
- Add the manager to this group.
- Give the “Manager” group access to the team’s recordings (set as “Parent” group).
- The manager does not need to be a member of the regular team group.
- This way, the manager can see all team recordings, but the team cannot see the manager’s recordings.
Multiple Managers or Hierarchies
- If you have several managers (e.g., for different teams), repeat the above for each team.
- For higher-level managers (e.g., VP Sales), create a “Leadership” group and give it access to all relevant team groups.
Personal Privacy
- If someone wants to keep their own recordings private, they can set their personal preference to “Only Me.”
Note: This is for individual use only and should not be set as a default for the entire company.
Example Scenario
-
Team: “Sales Team A” (members: Alice, Bob, Carol)
-
Manager: Monika
Setup:
- Group 1: “Sales Team A” (Alice, Bob, Carol)
- Group 2: “Sales Team A Management” (Monika)
- “Sales Team A Management” group is given access to “Sales Team A” recordings.
- Monika’s recordings are only visible to herself (unless she chooses otherwise).
Why This Structure?
- Managers can review all team activity without exposing their own meetings.
- Teams only see what’s relevant to them.
- Data privacy and clarity are maintained, even in complex organizations.
Tips
- Avoid adding managers directly to team groups if they want to keep their own recordings private.
- Use “Manager” or “Leadership” groups as “parents” for access control.
- Document your group structure for easy reference.
Pro Tips 🚀
- Avoid adding managers directly to team groups if they want to keep their own recordings private.
- Use “Manager” or “Leadership” groups as “parents” for access control.
- Document your group structure for easy reference.
If you need help setting this up or want a tailored example for your organization, just let our support team know. They would be happy to help!
FAQs
Need Help?
If you have questions about group permissions or need help setting them up, please reach out to your Demodesk support team.
Related articles
More in this category
Still need a hand?
Our support team answers in the app chat, or at support@demodesk.com.