Manual Upload of Recordings
Updated July 29, 2024
On this page
🪧 Why Manual Upload is Valuable
- Immediate Value: By uploading existing recordings, you can immediately leverage Demodesk's powerful tools, even if you haven't recorded new meetings with Demodesk yet.
- Flexibility: This feature allows you to consolidate all your meeting recordings in one place, regardless of the source, making it easier to manage and review them.
- Enhanced Organization: Uploaded recordings are automatically transcribed and summarized. You can edit the names of recordings for better organization and clarity.
How to Use Manual Upload
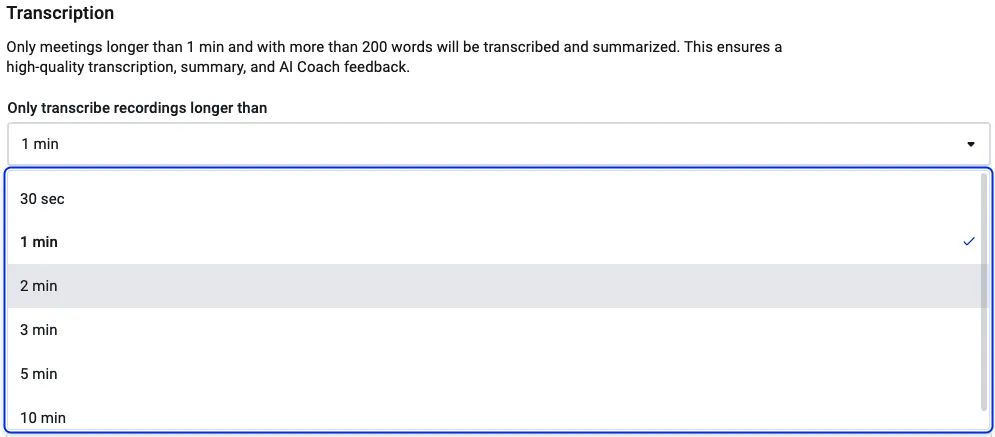
Step 1: Review Your Transcription Settings
Before uploading, ensure your transcription settings are appropriate for the length of your recordings. If your recordings are shorter than 2 minutes, update your transcription settings here.
Step 2: Locate the Upload Button
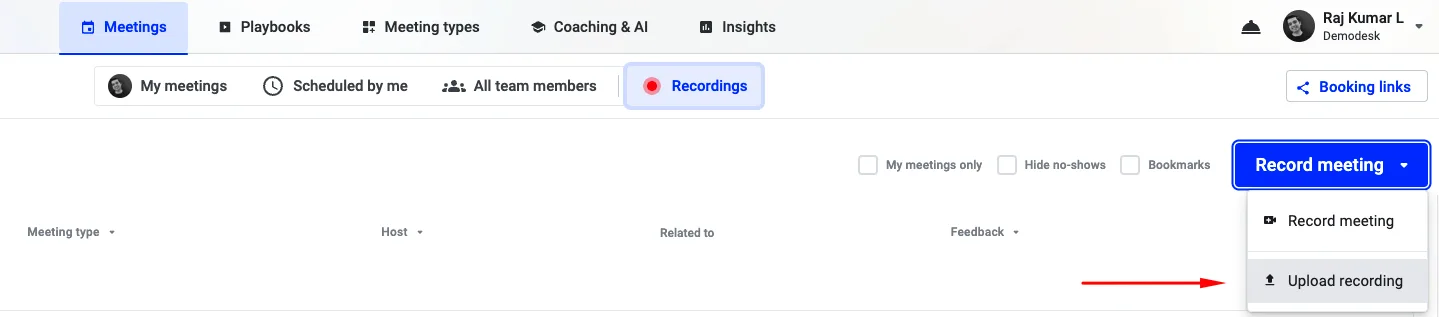
The "Upload recording" button is prominently displayed in your recording list.
- Go to the "Meetings" tab
- Click on "Recordings" to access your recording list
- Find the "Upload recording" button
Step 3: Upload Your Files
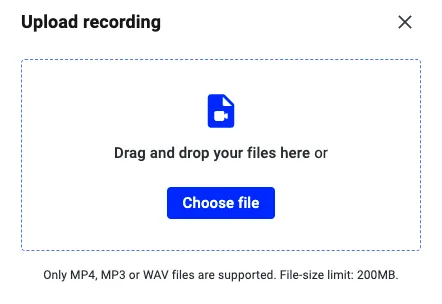
- Click the "Choose file" button
- Select one or multiple files to upload. Supported formats include MP4, MP3, and WAV.
- Click "Upload" to start the process automatically.

Step 4: Transcription and Summarization
Once uploaded, your recordings will be automatically transcribed and summarized. This helps you quickly review the content of your meetings.
- Automatic Processing: Transcription and summarization start automatically after upload.
- Speaker Identification: Our AI will automatically identify and label the speakers in your recordings.
Step 5: Organize and Analyze Your Recordings
-
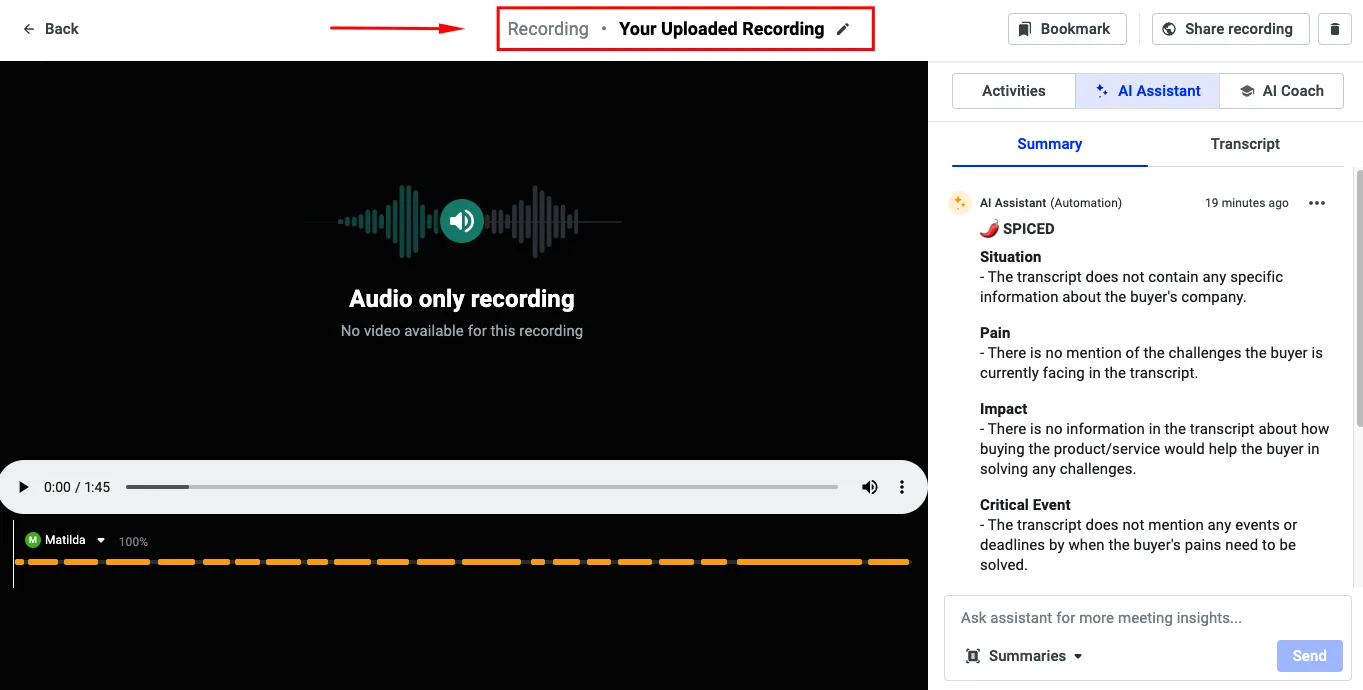
Edit Names: Click on a recording to edit its name for better categorization and retrieval.
-
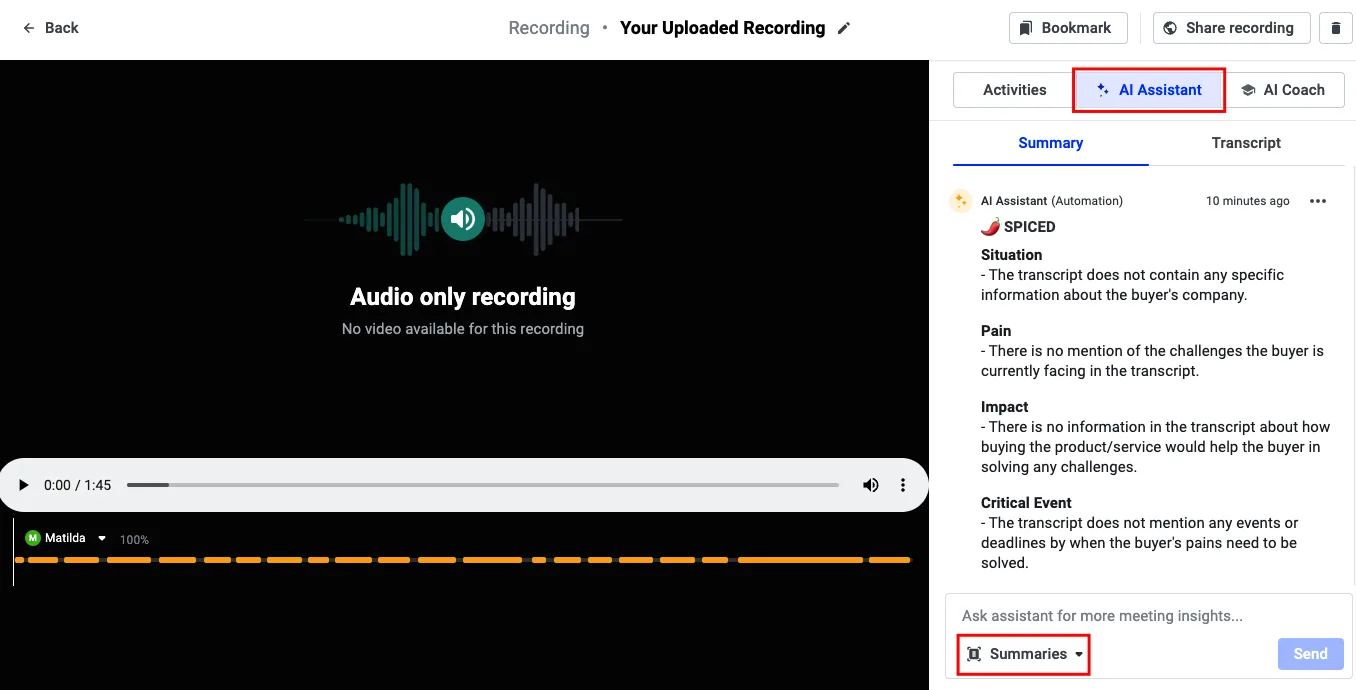
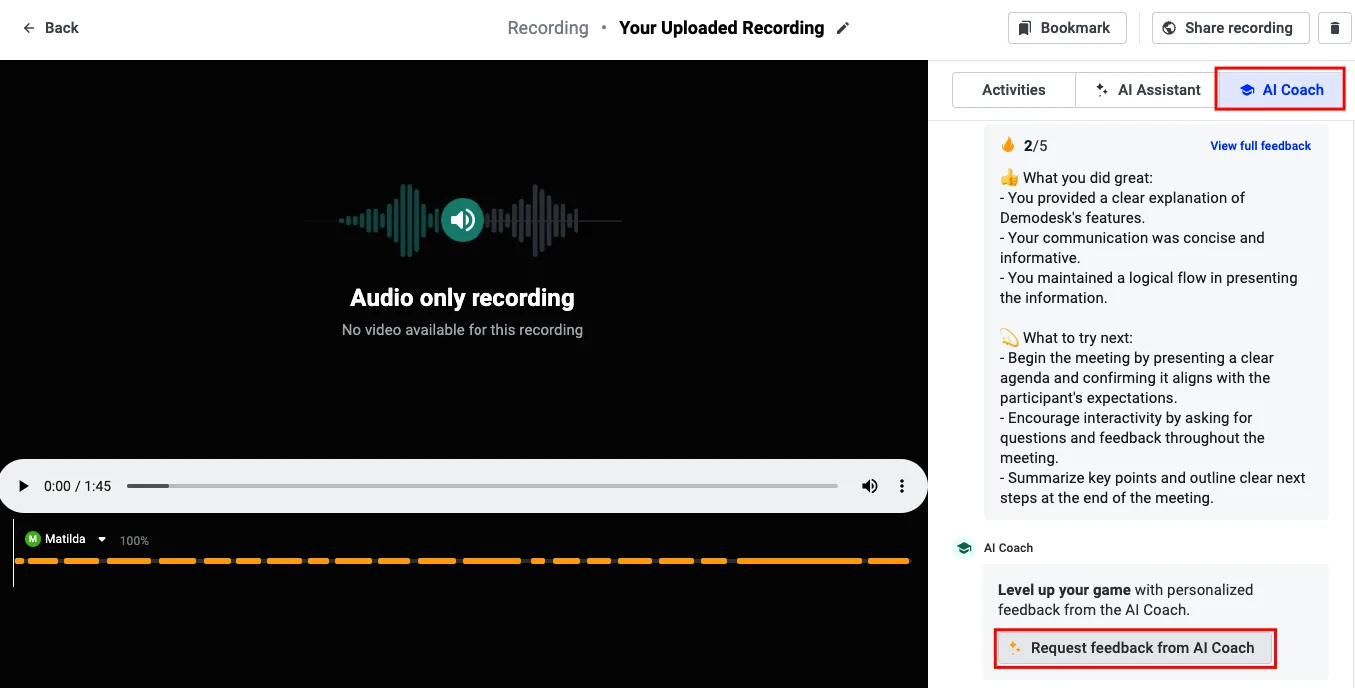
Analyze: You can initiate scorecards and generate summaries in the recording view to receive feedback based on your predefined criteria.
Step 6: Review and Edit Speaker Timelines
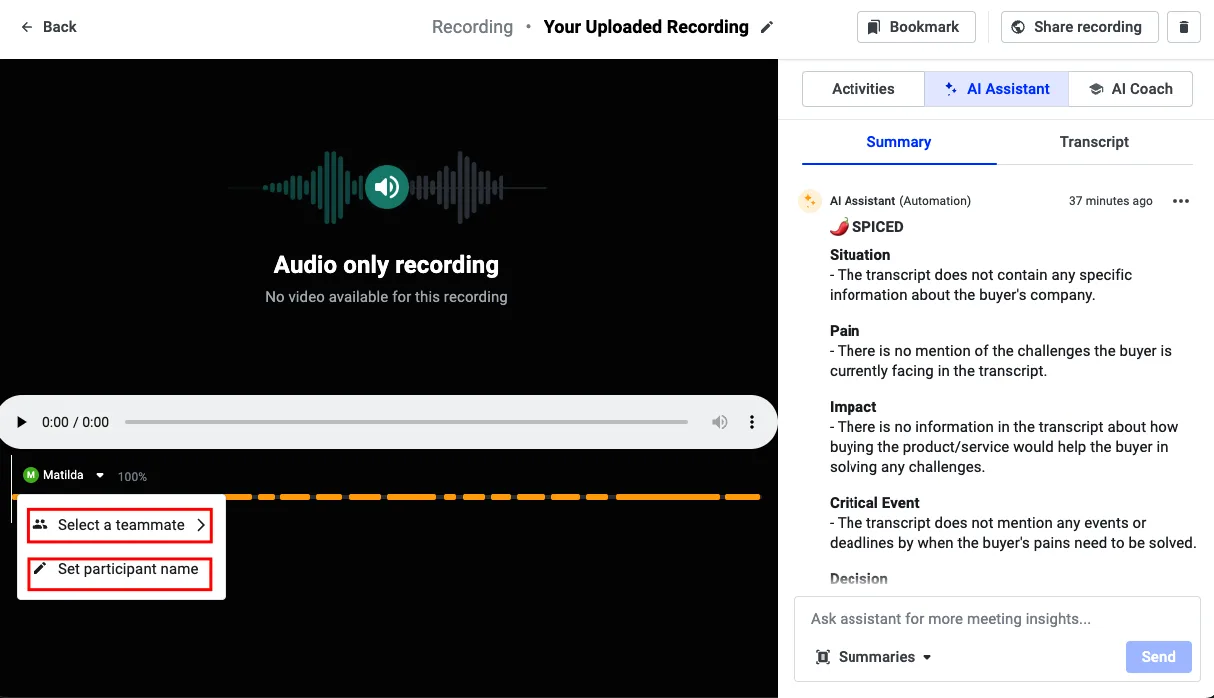
- Assign Speaker Names: If the AI incorrectly identifies a speaker, you can manually assign the correct names.
- Reflect Changes: Any changes you make to speaker names will be updated across all related data, including timelines and transcripts.
🚀 Note: Audio-only files are visualized effectively, making them easy to review and manage.
By using the Manual Upload feature, you can ensure that all your important meetings are captured, transcribed, and organized in Demodesk, regardless of the recording source. This flexibility and convenience help you maximize the value of Demodesk's powerful tools for your sales processes.
Related articles
More in this category
Still need a hand?
Our support team answers in the app chat, or at support@demodesk.com.